

How To Clean Rusty Garden Tools
Oh, here comes that time of the year! Do you feel like adding another beautiful plant to your garden and need your favorite shovel? Do your lovely houseplants require some pruning here and there? Or, maybe, you just want to give your bushy companions a fresh overall look. But surprise! The garden tools you have relied on until today are all rusty and nothing seems to go on as planned. No worries, gardener!
Not only will we help you get rid of all the rust on your tools, but we will also teach you the secrets of preventing them from corroding again in the future. Whether you're dealing with a rusty pair of garden scissors, pruning shears, garden knives, shovels, or other garden tools, you will soon know how to solve this annoying problem.
We know, there is nothing more satisfying for a dedicated gardener than to keep his or her tools in top shape. Finding your garden tools all-rusted and unaesthetic can be quite frustrating sometimes, but throwing them out is not the best option. When the tools receive suitable care, they can make for great lifetime buddies that will shine in all their splendor and be of use for a long time.
Read on to find out why garden tools become rusty, how to clean them, and how to prevent them from suffering this type of damage.
How Did My Garden Tools Get Rusty in the First Place?
First thing's first! You should know that this can happen to anyone, no matter how experienced or attentive you are with your tools. All species of plants need routine care to remain all-clean and to grow healthy and happy, so why would garden tools be any different?
When they are properly cleaned and stored, your tools will be in good shape for a long time. If not, you must dedicate some time to cleaning them. Paying a little extra attention to a few important details will help you understand why your garden tools can get rusty sometimes:
- They are best stored in areas with dry air. A garage or any other indoor location that meets their requirements is highly recommended.
- When kept outdoors, your garden tools should be hanged on hooks to make sure that they are not sitting in water for a long period.
- Water, along with many other residues that remain on the tools, are usually the most common factors that lead to rust.
- If you are attached to your garden tools and don't want to replace them yearly, regular cleaning is mandatory. The blades or other metal components should be cleaned both before and after each use.
- Be careful what kind of oil you are using when cleaning your tools. Motor oil is pretty good, but an alternative version of vegetable oil is less toxic, more eco-friendly, and just as effective.
- Sterilizing your garden tools with rubbing alcohol before using them can reduce the chances of getting rusted in the process.

Prevent Your Garden Tools from Getting Rusty
Obviously, the best solution for your rusty garden tools is prevention. Make sure you do not forget to clean your tools very well after each use. Removing any dirt, such as sticky residue or sap is highly recommended. Many gardeners clean their garden tools using a coarse metal brush or dry rag because these materials are known for their ability to eliminate residues well. For optimal results, prepare your own cleaning mixture by combining a small quantity of water with dish soap or pine sol.
Once you have finished the cleaning process, you should dry your garden tools properly and rub them down with mineral oil. In general, tools can also benefit from regular spraying with a popular substance designed to protect the metal from rust and corrosion known as WD-40.
As mentioned above, another relevant factor to prevent your garden tools from becoming rusty is creating a suitable storing place for them. The ideal location for your tools should have very low humidity levels. But this is not all! Some experienced growers came up with another life-saving solution−as long as you store your garden tools with their blades down in a container filled with sand and mineral spirits, you will avoid unpleasant surprises, such as rust, for a long time.
What to Do When Things Do Not Go as Expected
And, believe us, in the gardening world, things rarely go as planned. With all the preventive methods and steps followed accordingly, there will always be some things that we cannot control. When kept outdoors, your garden tools may experience fluctuations of environmental conditions that can result in rust, such as sudden rainfalls, vapors, high humidity, or unusual oxygen levels.
But every problem has a solution, so there is no need to worry too much about it! Our duty is to make your experience as a gardener more pleasant, so we have some very useful tips and tricks to clean your rusty garden tools fast and easy.
Keep reading and you will discover several effective ways of saving your favorite tools from rust!
Soak Your Tools in a Nice Apple Cider Vinegar Bath
This method is probably the most popular for cleaning rust because it is very effective. Whether your garden tools are just a little bit tinted in rust or entirely covered, you can consider vinegar your best friend in this journey. In general, you can clean your rusty tools by soaking them in a diluted mixture obtained from equal parts of water and apple cider vinegar.
Depending on how rusty your garden tools are, the concentration of the mixture may be different. If the tools are full of rust, it is suggested you increase the amount of vinegar when preparing the soaking medium. For slightly rusted tools, however, a decrease in concentration is more than welcome.
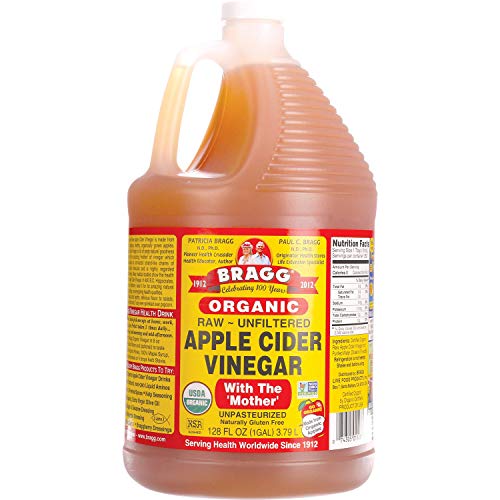
Bragg Organic Apple Cider Vinegar, From Amazon
Once you have prepared the apple cider vinegar mixture, place the iron components of your tools in it. The acidity of the vinegar will do its magic if you allow your garden tools to sit in the soaking medium for at least one day. After about 24 hours, you can easily say goodbye to the rustiest sections of your tools and move on to the rest.
Keep your energy up, because the fun part will soon begin! Remove the tools from the vinegar mixture and rub the rust off using circular moves. The rust is best taken care of when your garden tools are rubbed with a brush, scouring pad, steel wool, or a crumpled-up piece of aluminum foil. Keep in mind that some tools, like pruning shears or garden scissors, require extra attention in this process. Make sure you get into the gears, crannies, and nooks to prevent any possible spread of rust.
When you are satisfied with your work, dry your tools thoroughly with a piece of cloth or paper towels. The next step is all about applying a rust-protecting and lubricating oil, so you need to get your garden tools as dry as you can to allow the metal to absorb the oil. For the final touch, you can tub your tools with any kind of mineral oil you want, WD-40, or a 3-IN-ONE Multi-Purpose Oil.
Use Baking Soda For Rust Stains or Small Areas of Rust
If you want to use your garden tools as soon as possible, baking soda can be a nice and time-saving alternative to remove rust. Before getting to work, you must degrease and clean your tools very well, then dry them completely with a paper towel. Once you have finished this step, you can pour baking soda into a bowl and add water just enough to make a slightly thick paste.
Get your fully-dried tools and apply the baking soda paste to the rusted areas until they are entirely covered in it. Let the mixture sit on the tools for a couple of hours then use a brush to rub the affected parts. When the tools seem clean enough, rinse with clean water, and dry them with a piece of cloth.
Dissolving the Rust in Cola or Black Tea
Removing rust has never been easier! Shoutout to those gardeners that always have a bottle of the famous soft drink in their house: this method is really effective! The phosphoric acid that is typically found among the other ingredients of soda is known for its ability to dissolve tiny spots of rust. Strong black tea can also be effective for tools that present only a few shades of rust.
This process implies a little effort on your part because all you have to do is to soak your tools in a can of soda or tea for a few hours and scrub away the rust afterward. For optimal results, make sure you rub the rusted components of your tools with a wire brush or a crumpled piece of aluminum foil. After these two tiny steps, clean the tools with water and dry them properly.
Rubbing the Rust With Lemon Juice and Salt
Another popular method of cleaning rusty garden tools is using a mixture obtained from equal parts of lemon juice, salt, and water. This homemade alternative is perfect for traditional gardeners and can show nice results in most cases.
Soak your tools in the mixture for a day or so, then rub them with steel wool or metal scour pad until you notice some changes. When you are satisfied with the overall appearance, rinse the tools with water and dry them thoroughly.
Removing rust can be a tedious and time-consuming activity, but we hope our tips and tricks will help you get back to gardening in no time. Let us know if the rust-removal strategies described above worked for you and feel free to share your tool-cleaning secrets in the comments below!
How To Clean Rusty Garden Tools
Source: https://gardenbeast.com/how-to-remove-rust-from-tools/
Posted by: whitesuccall.blogspot.com
0 Response to "How To Clean Rusty Garden Tools"
Post a Comment